Density Column
Density Column
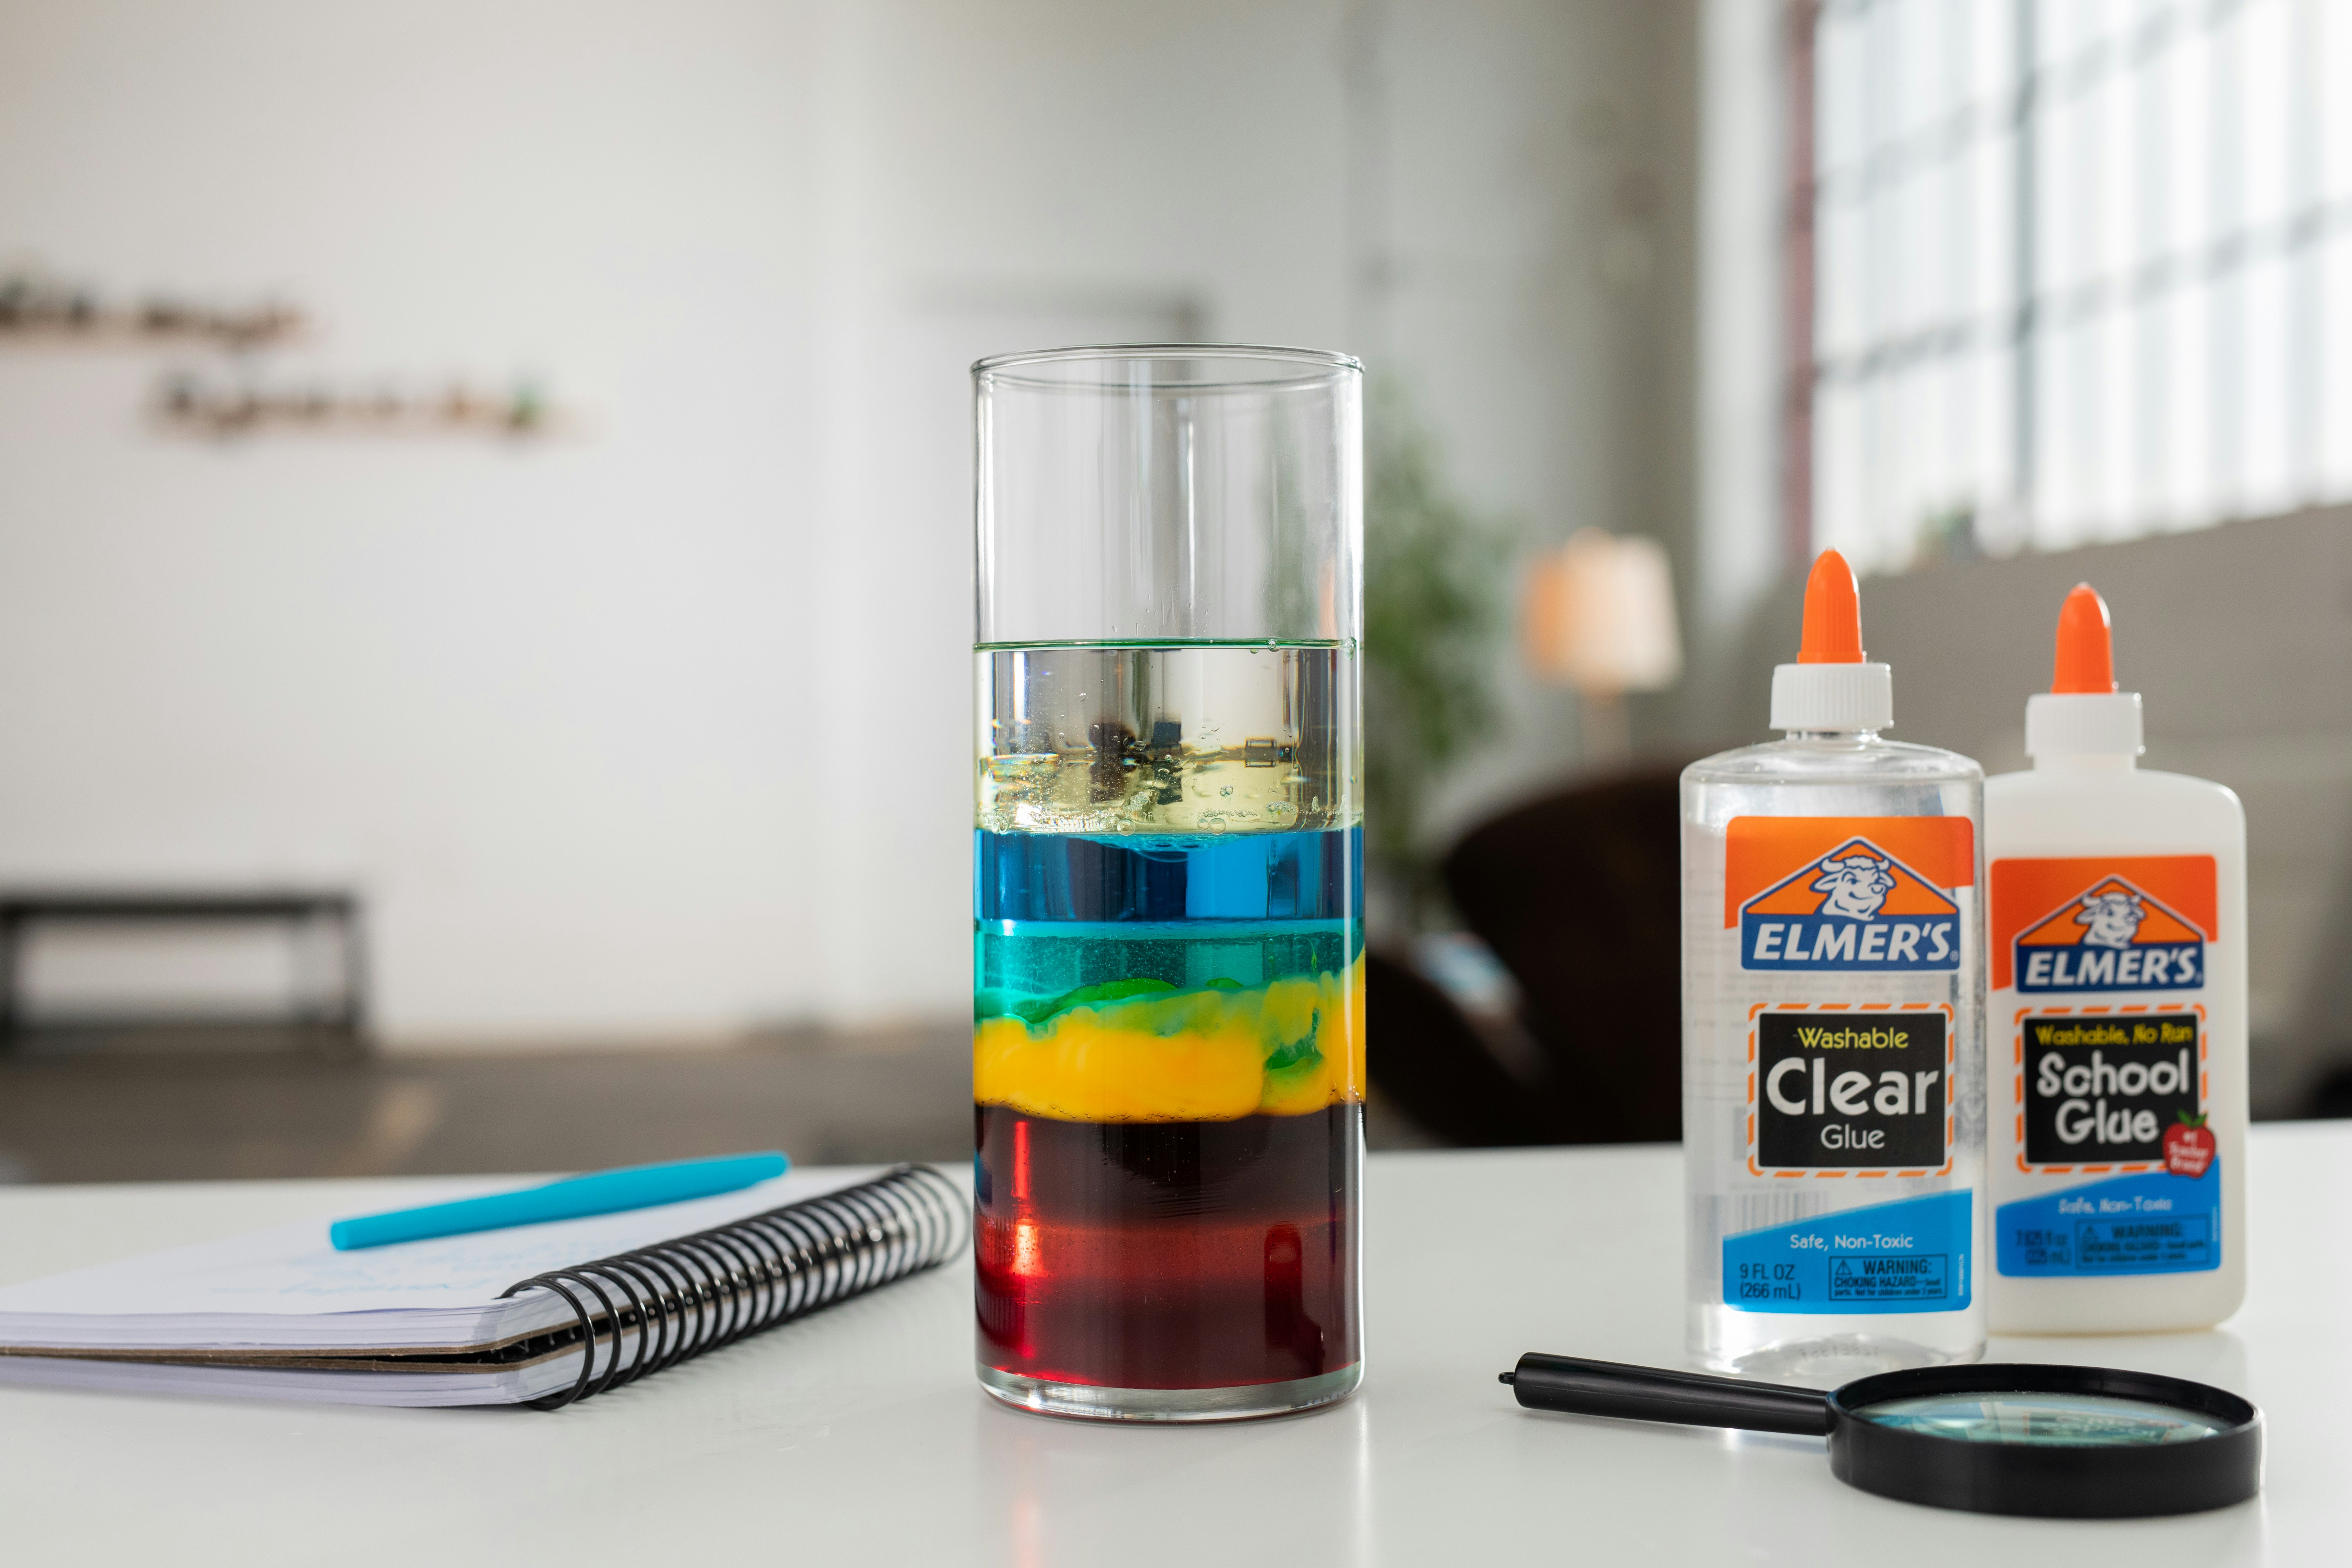
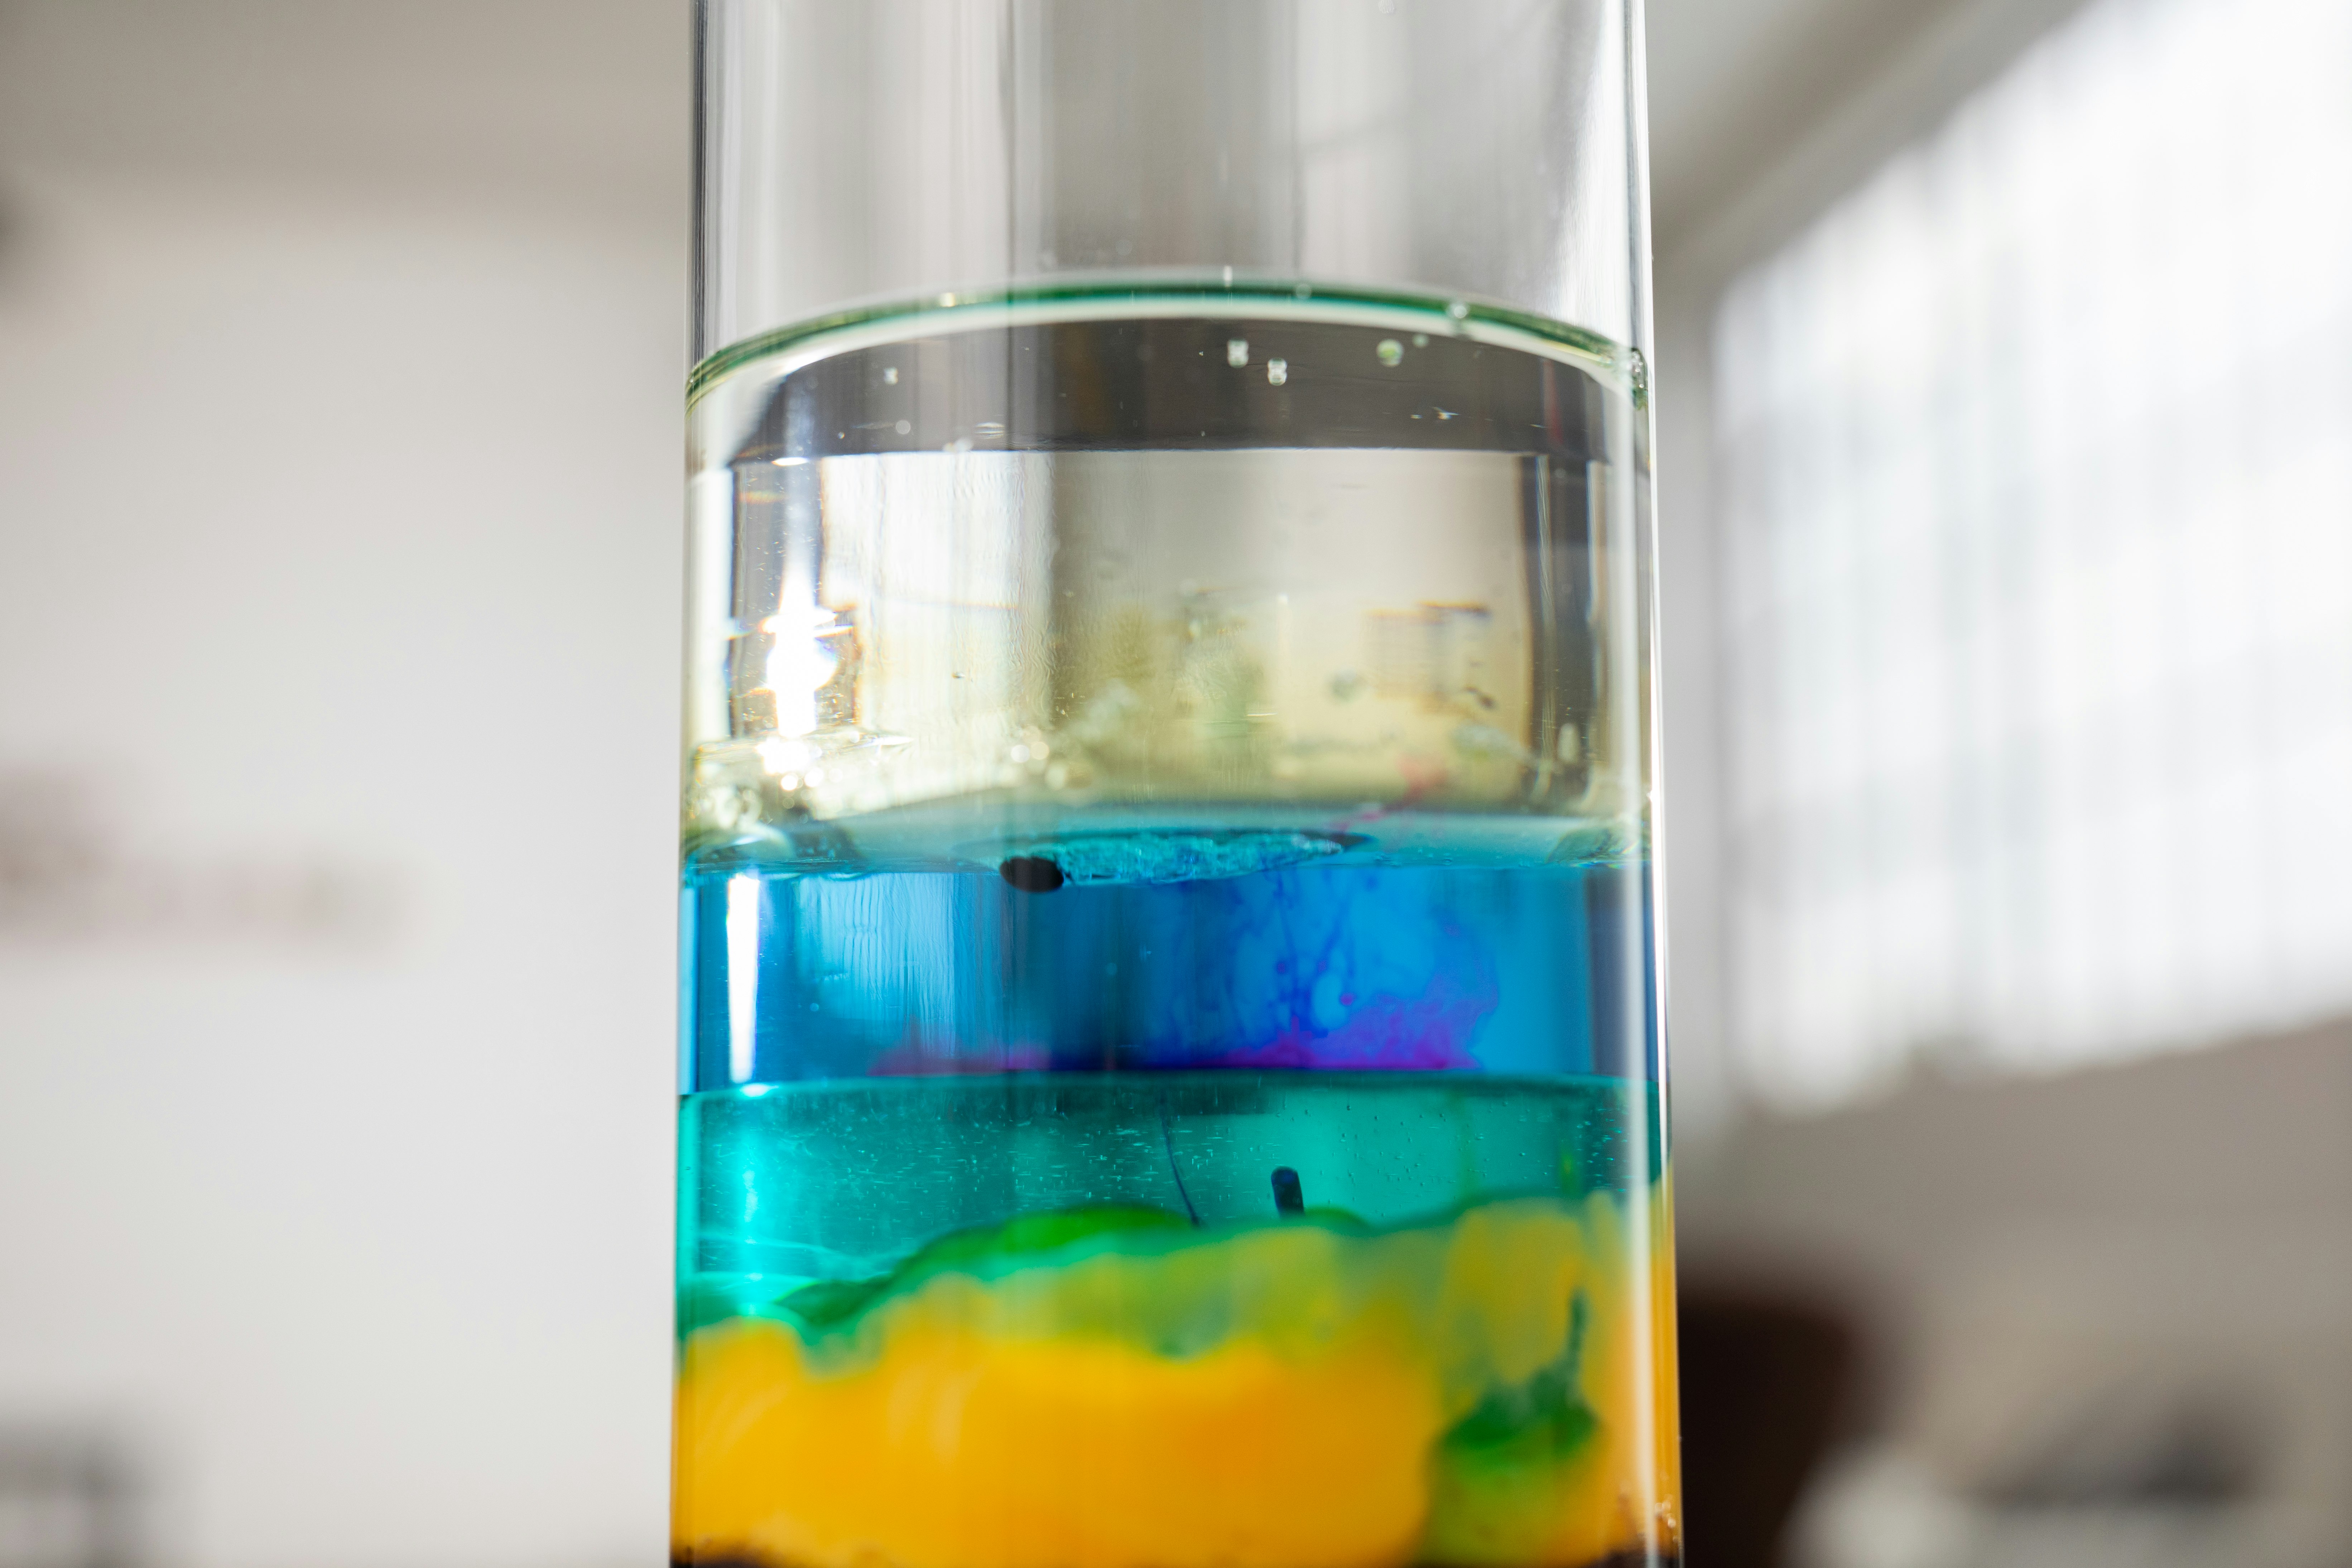
Stack oil on top of water on top of honey to create a density column.
School Year: 3–6
Activity Time: 30–45 minutes
STEAM Subject(s): Science (Chemistry), Art
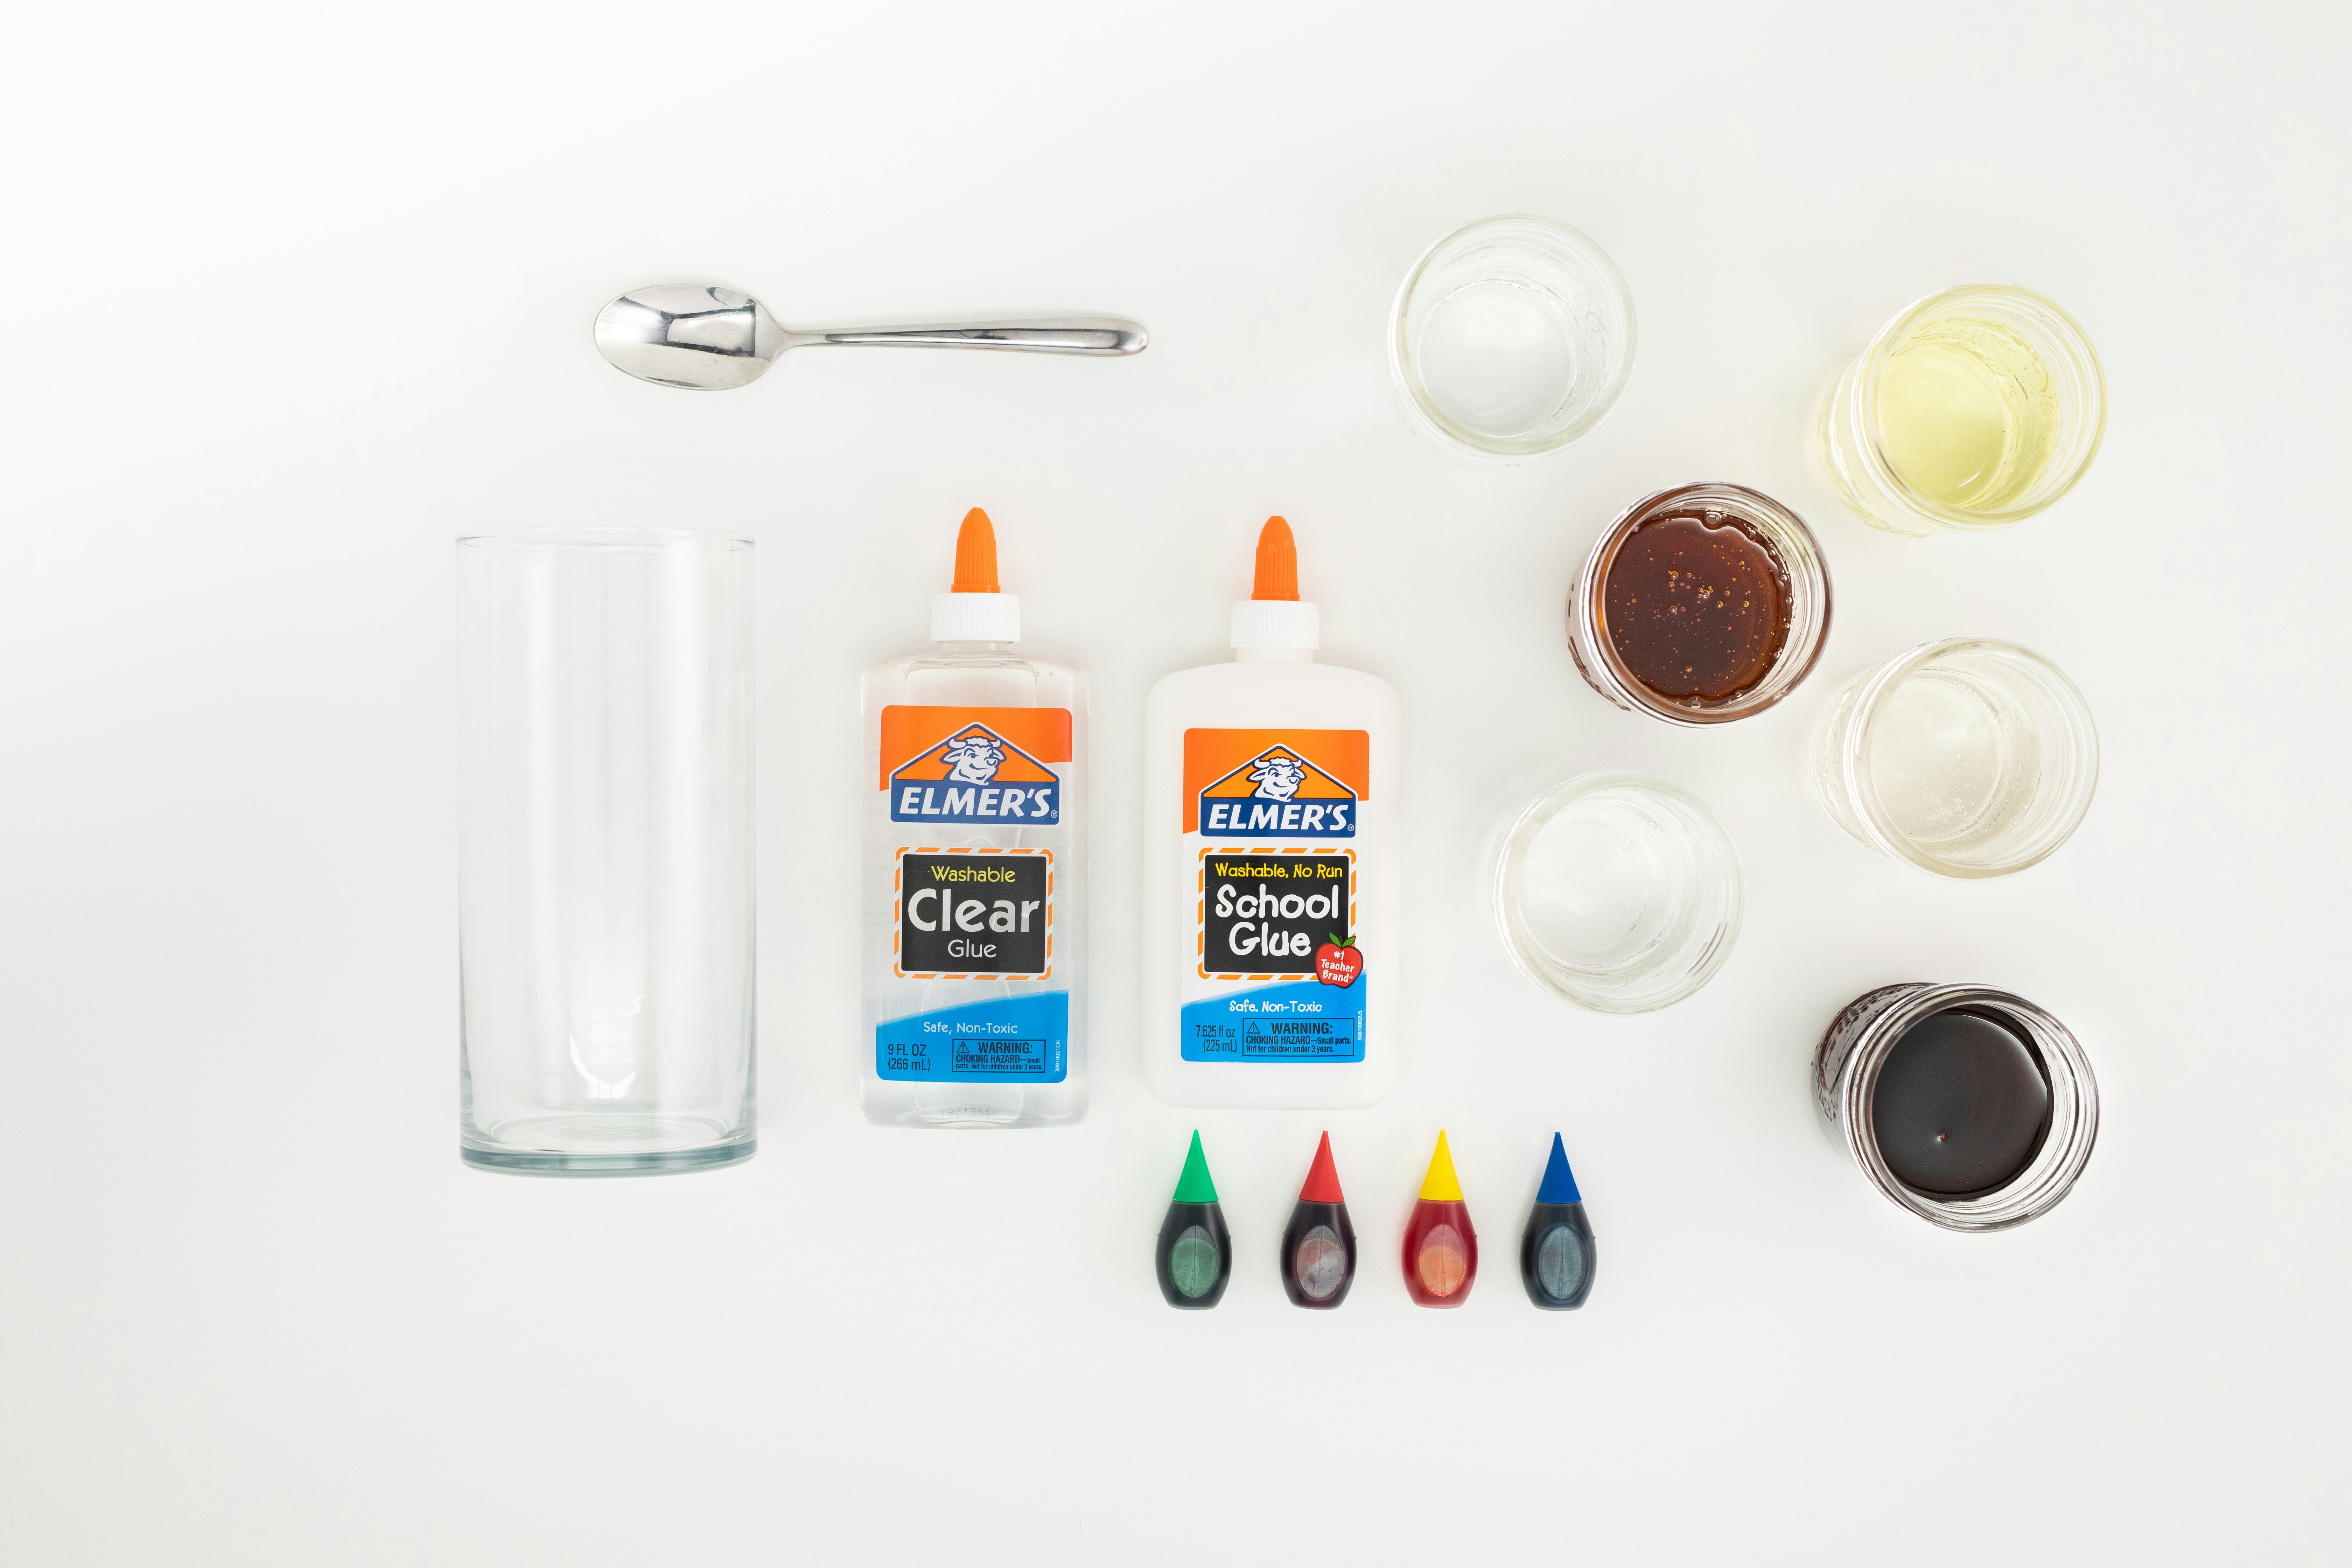
Supplies:
- Tall glass or vase
- 8 jars
- Spoon
- Food colouring (gel food colouring works best because it mixes with liquids of all densities)
- Various liquids for layering, including:
- Honey
- Light corn syrup
- Imitation maple syrup
- Water
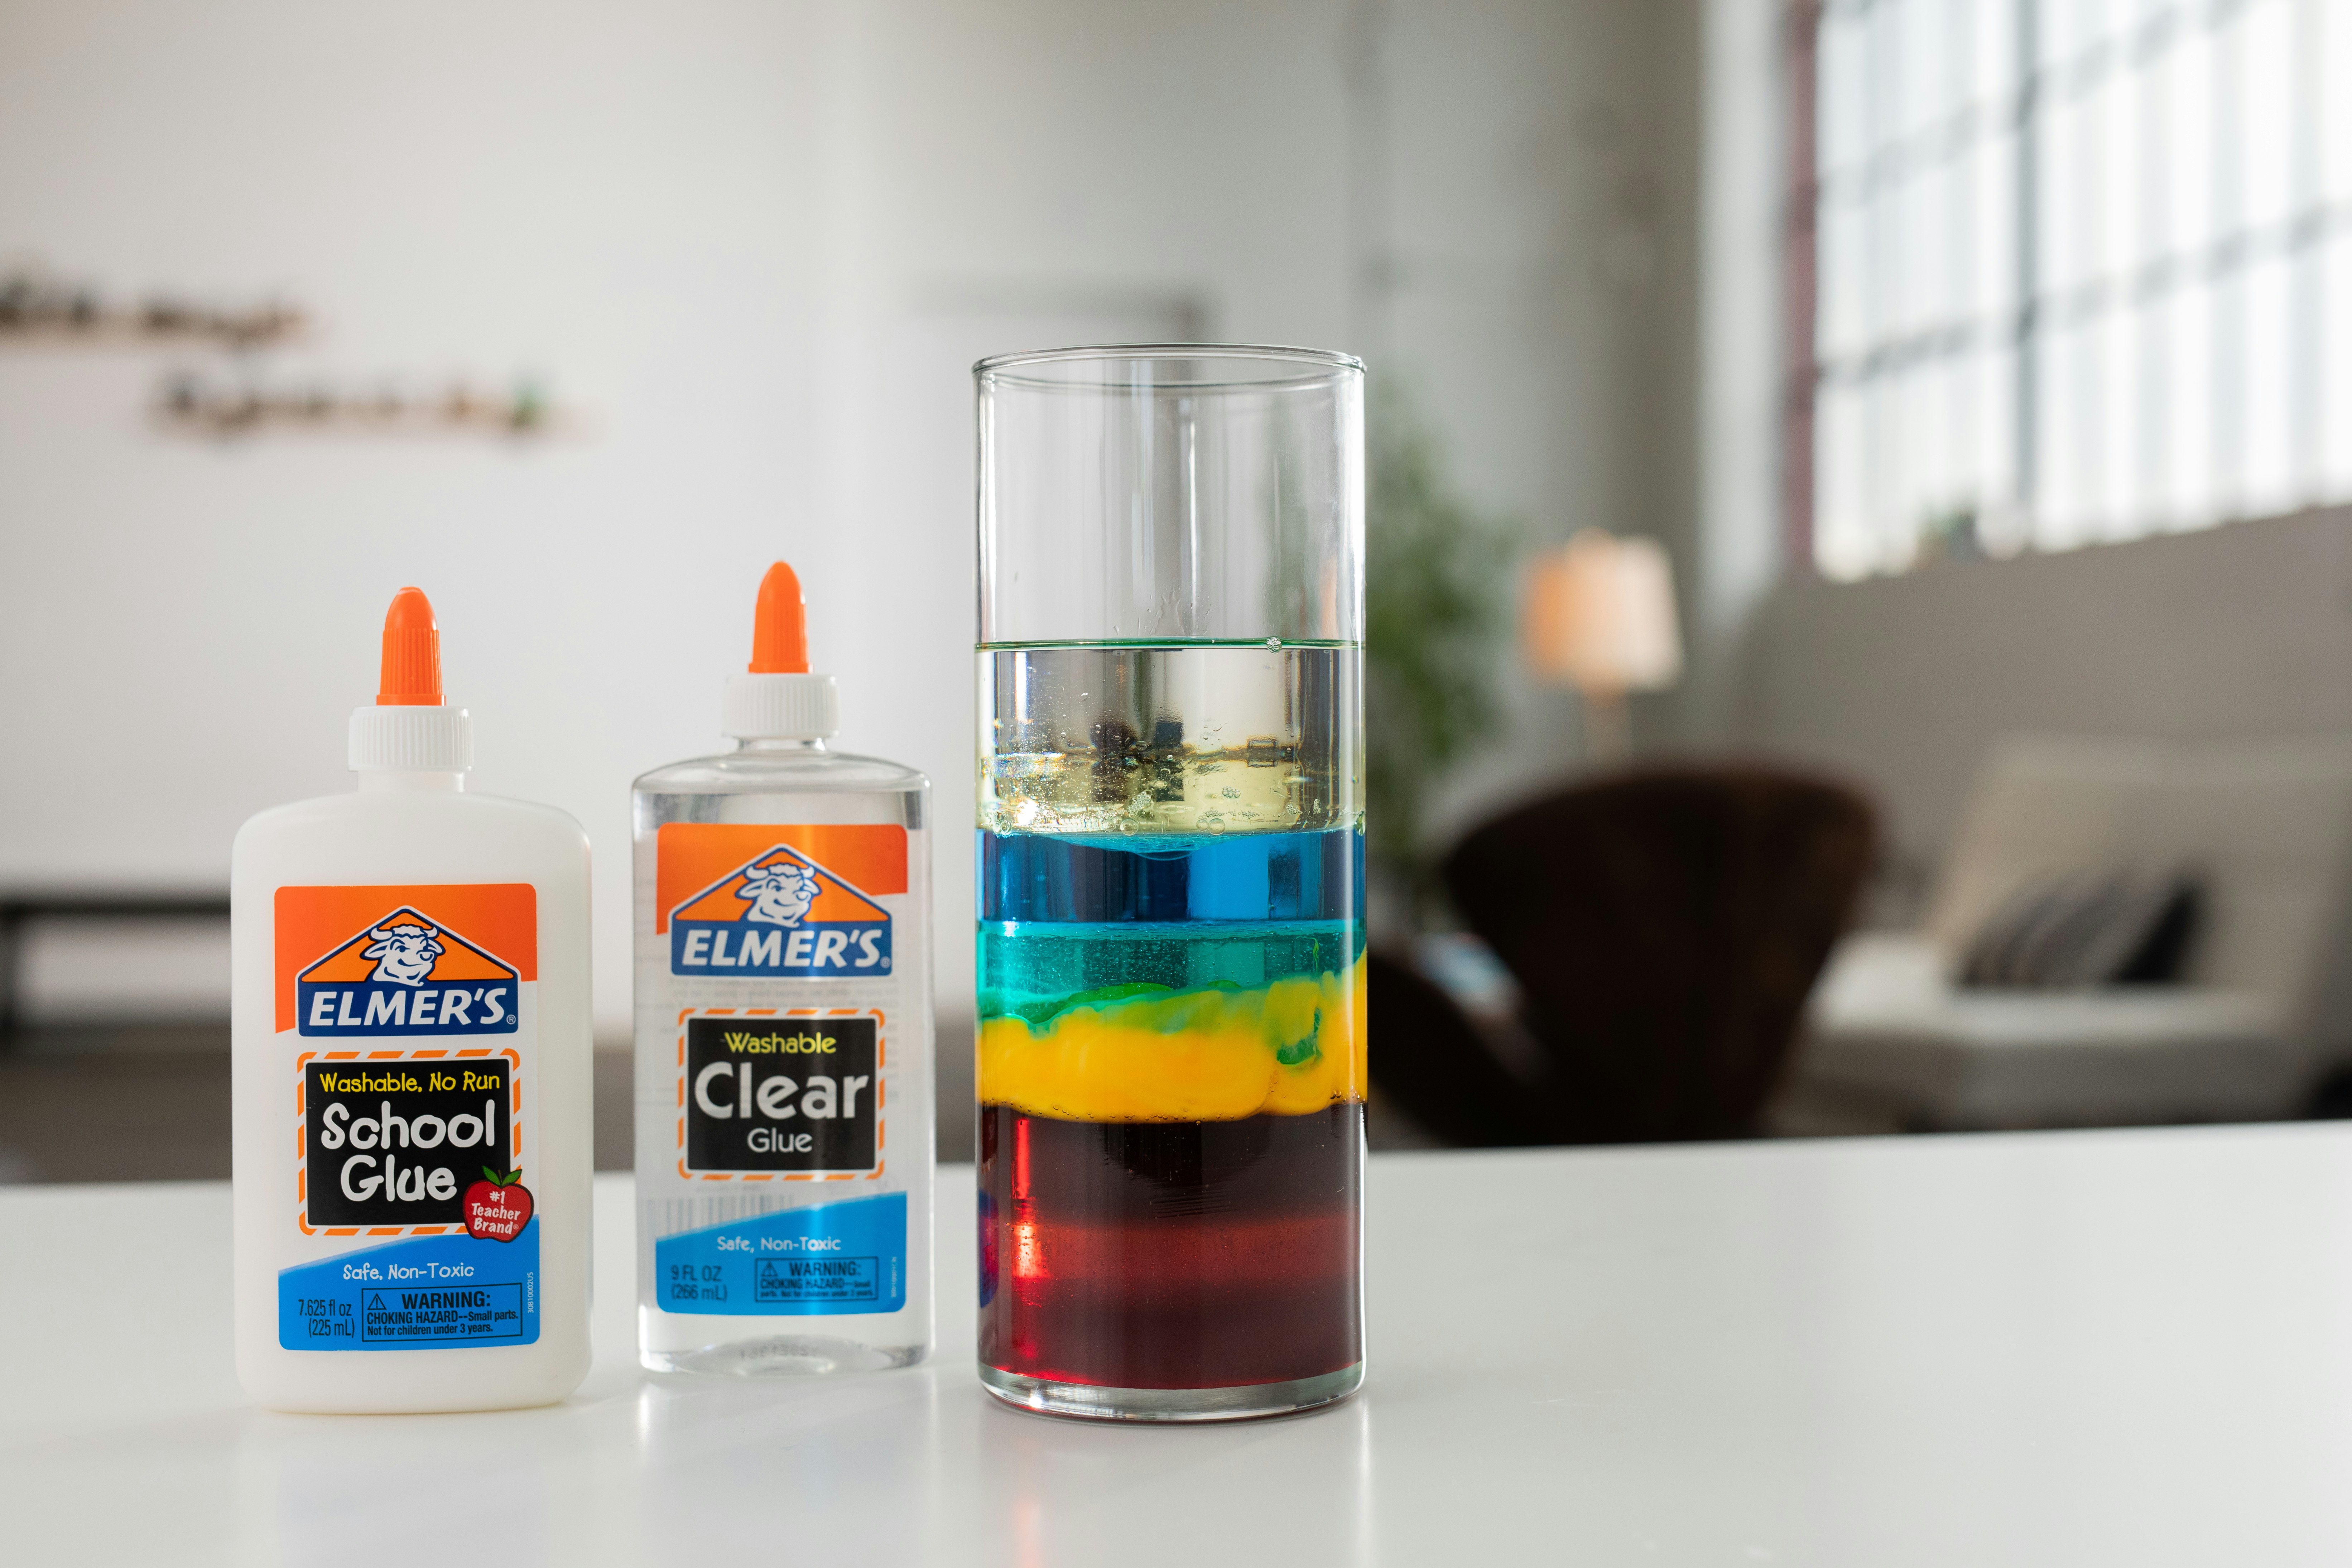
- Elmer’s White School Glue
- Elmer’s Clear School Glue
- Vegetable oil
- Baby oil
(Note: if you don’t have one or two of the liquids to hand, just skip it! The density column will still work!)
Instructions:
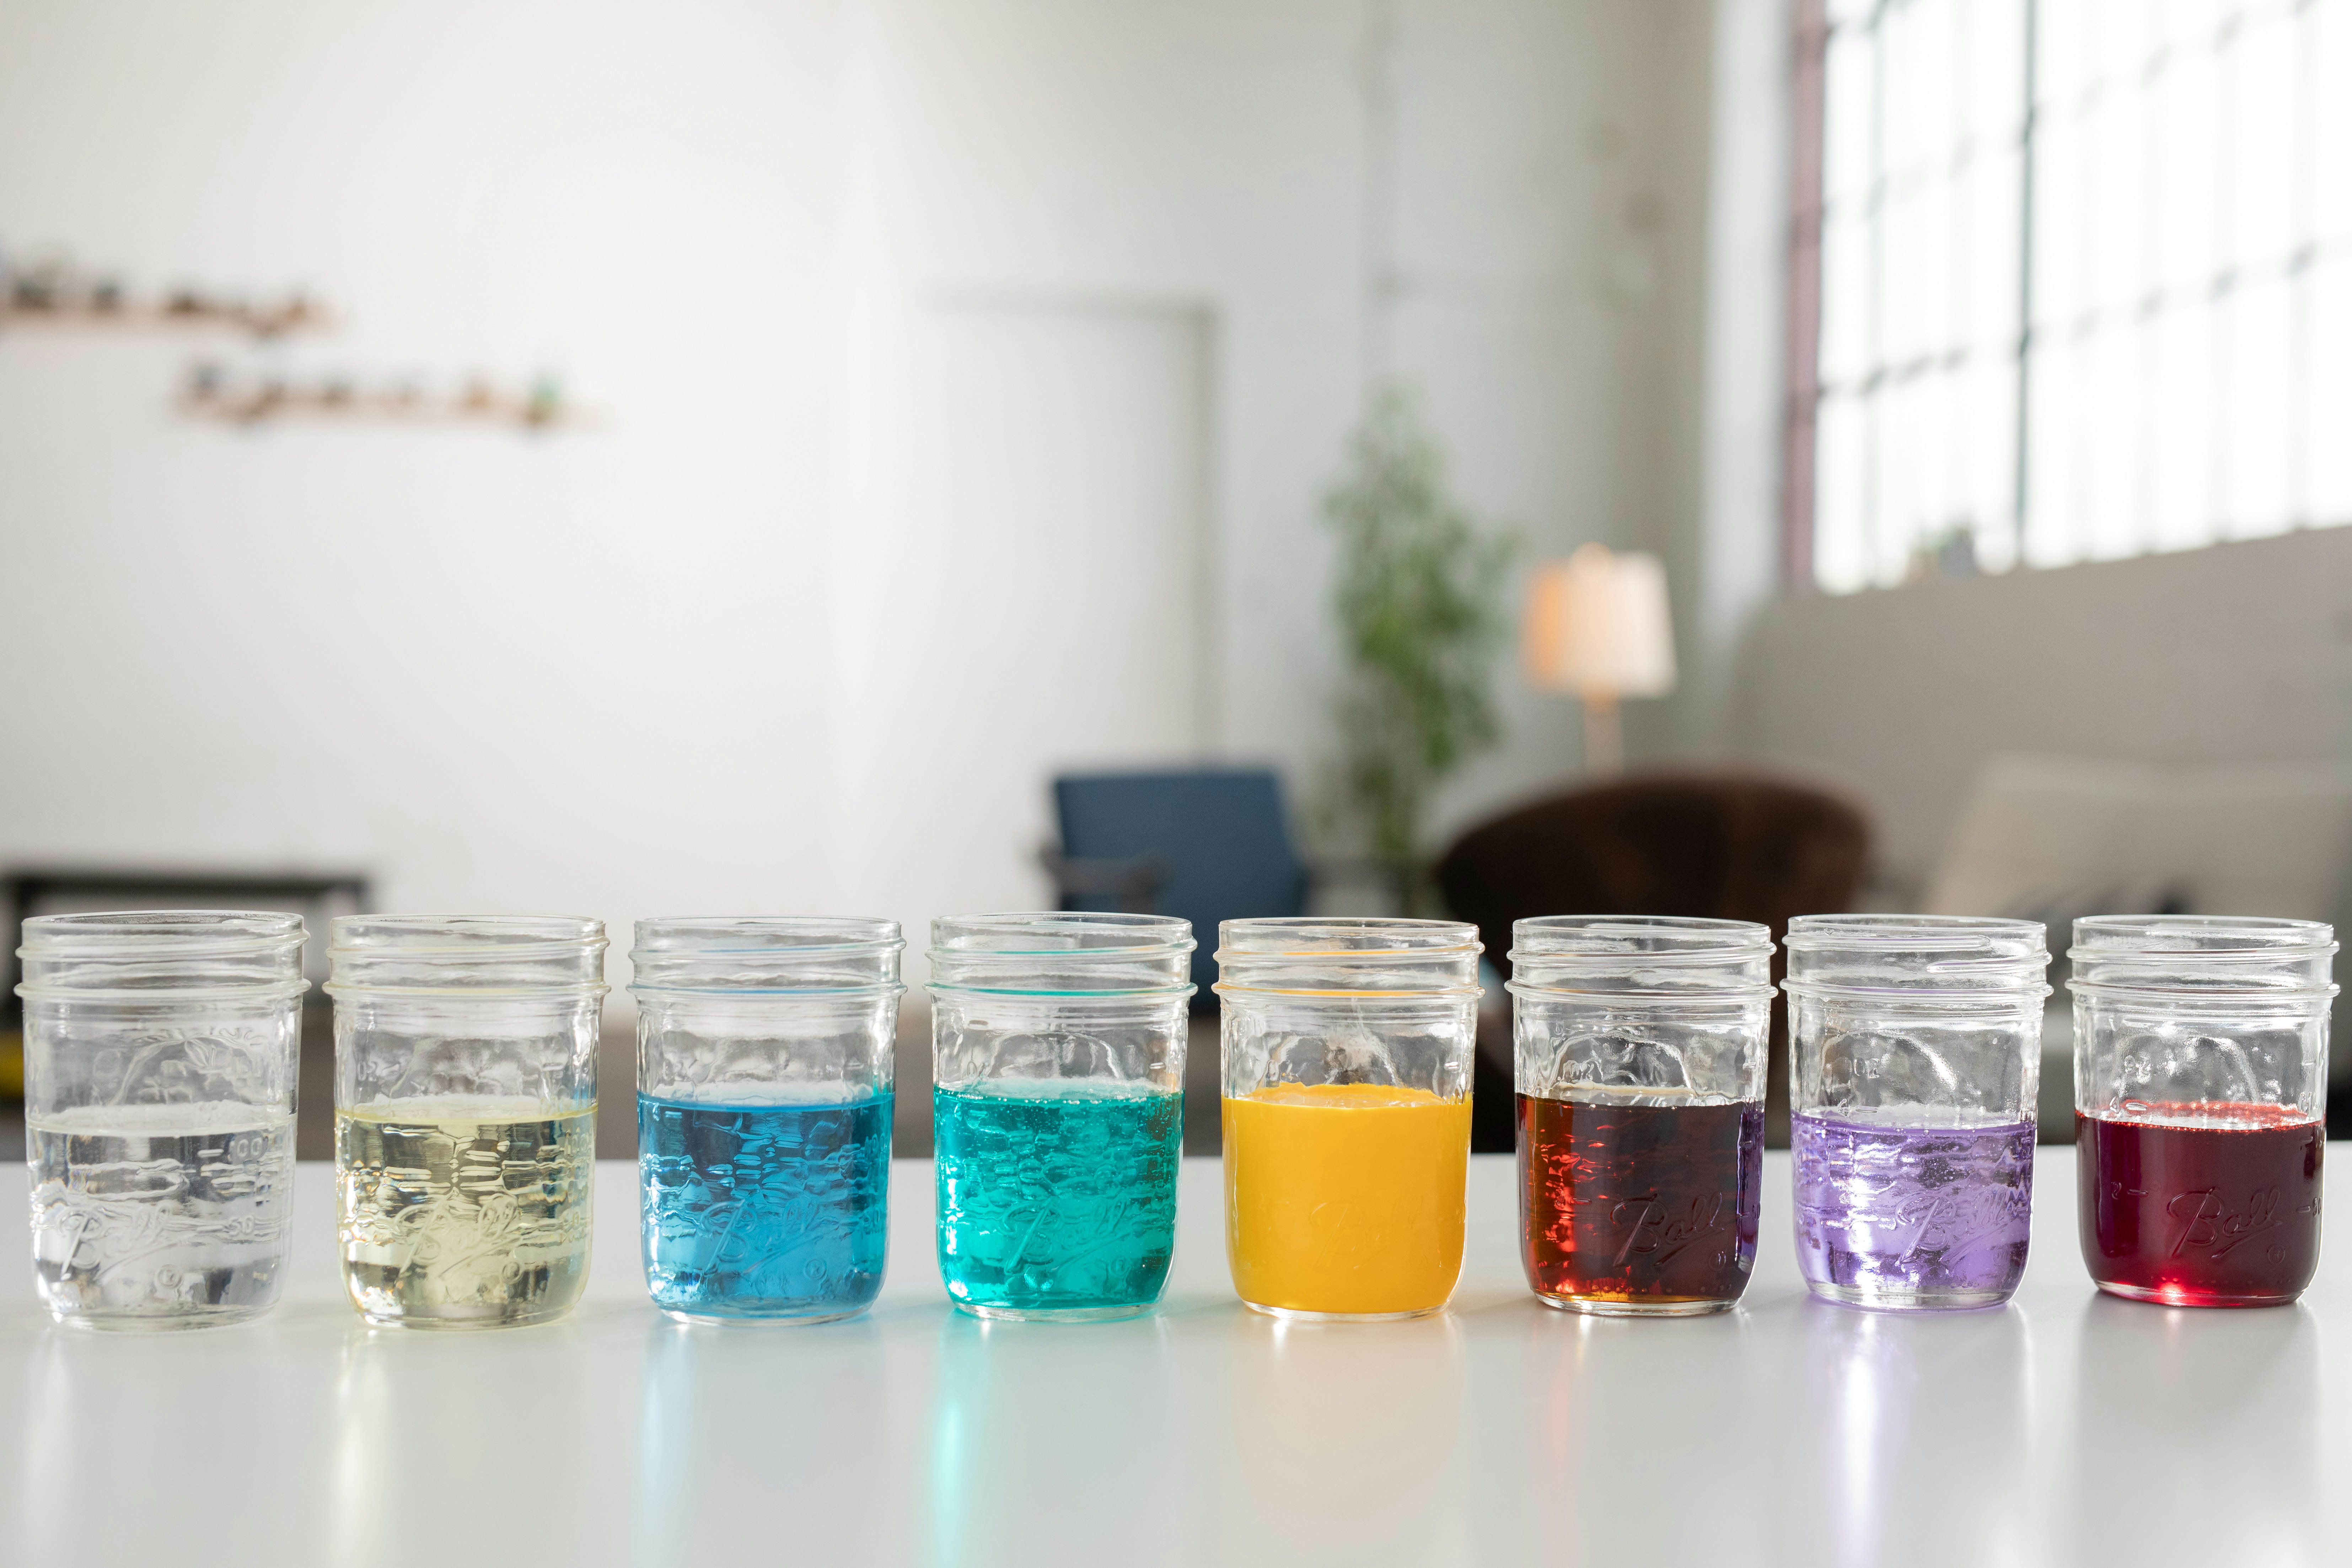
- Gather all your liquids for your density column. Measure out ½ cup of each liquid and pour it into its own jar.
- Colour your liquids. The honey and the maple syrup need dark colours, so we suggest dark blue or dark red. The corn syrup, glue and water work best with the lighter colours to help contrast the darker ingredients. (Note: the food colouring won’t mix into the baby oil or vegetable oil. See our Level Up section below for a fun experiment to learn what happens with food colouring and oil.)
- Once you have all of your liquids coloured, you can start layering. Start with the liquid with the highest density. (If you’re interested in learning how to calculate the density of each liquid, check out the STEAM extensions below.) Here is a list of liquids and their approximate densities. As you can see, honey is our highest-density liquid, and baby oil is our lowest.
- Honey (1.42 kg/l)
- Light corn syrup (1.33 kg/l)
- Imitation maple syrup (1.32 kg/l)
- Elmer’s White School Glue (1.07 kg/l)
- Elmer’s Clear School Glue (1.03 kg/l)
- Water (1 kg/l)
- Vegetable oil (0.92 kg/l)
- Baby oil (0.83 kg/l)
- Start with your densest liquid (in this case, the honey). Carefully pour it into the glass container without letting it touch the sides.
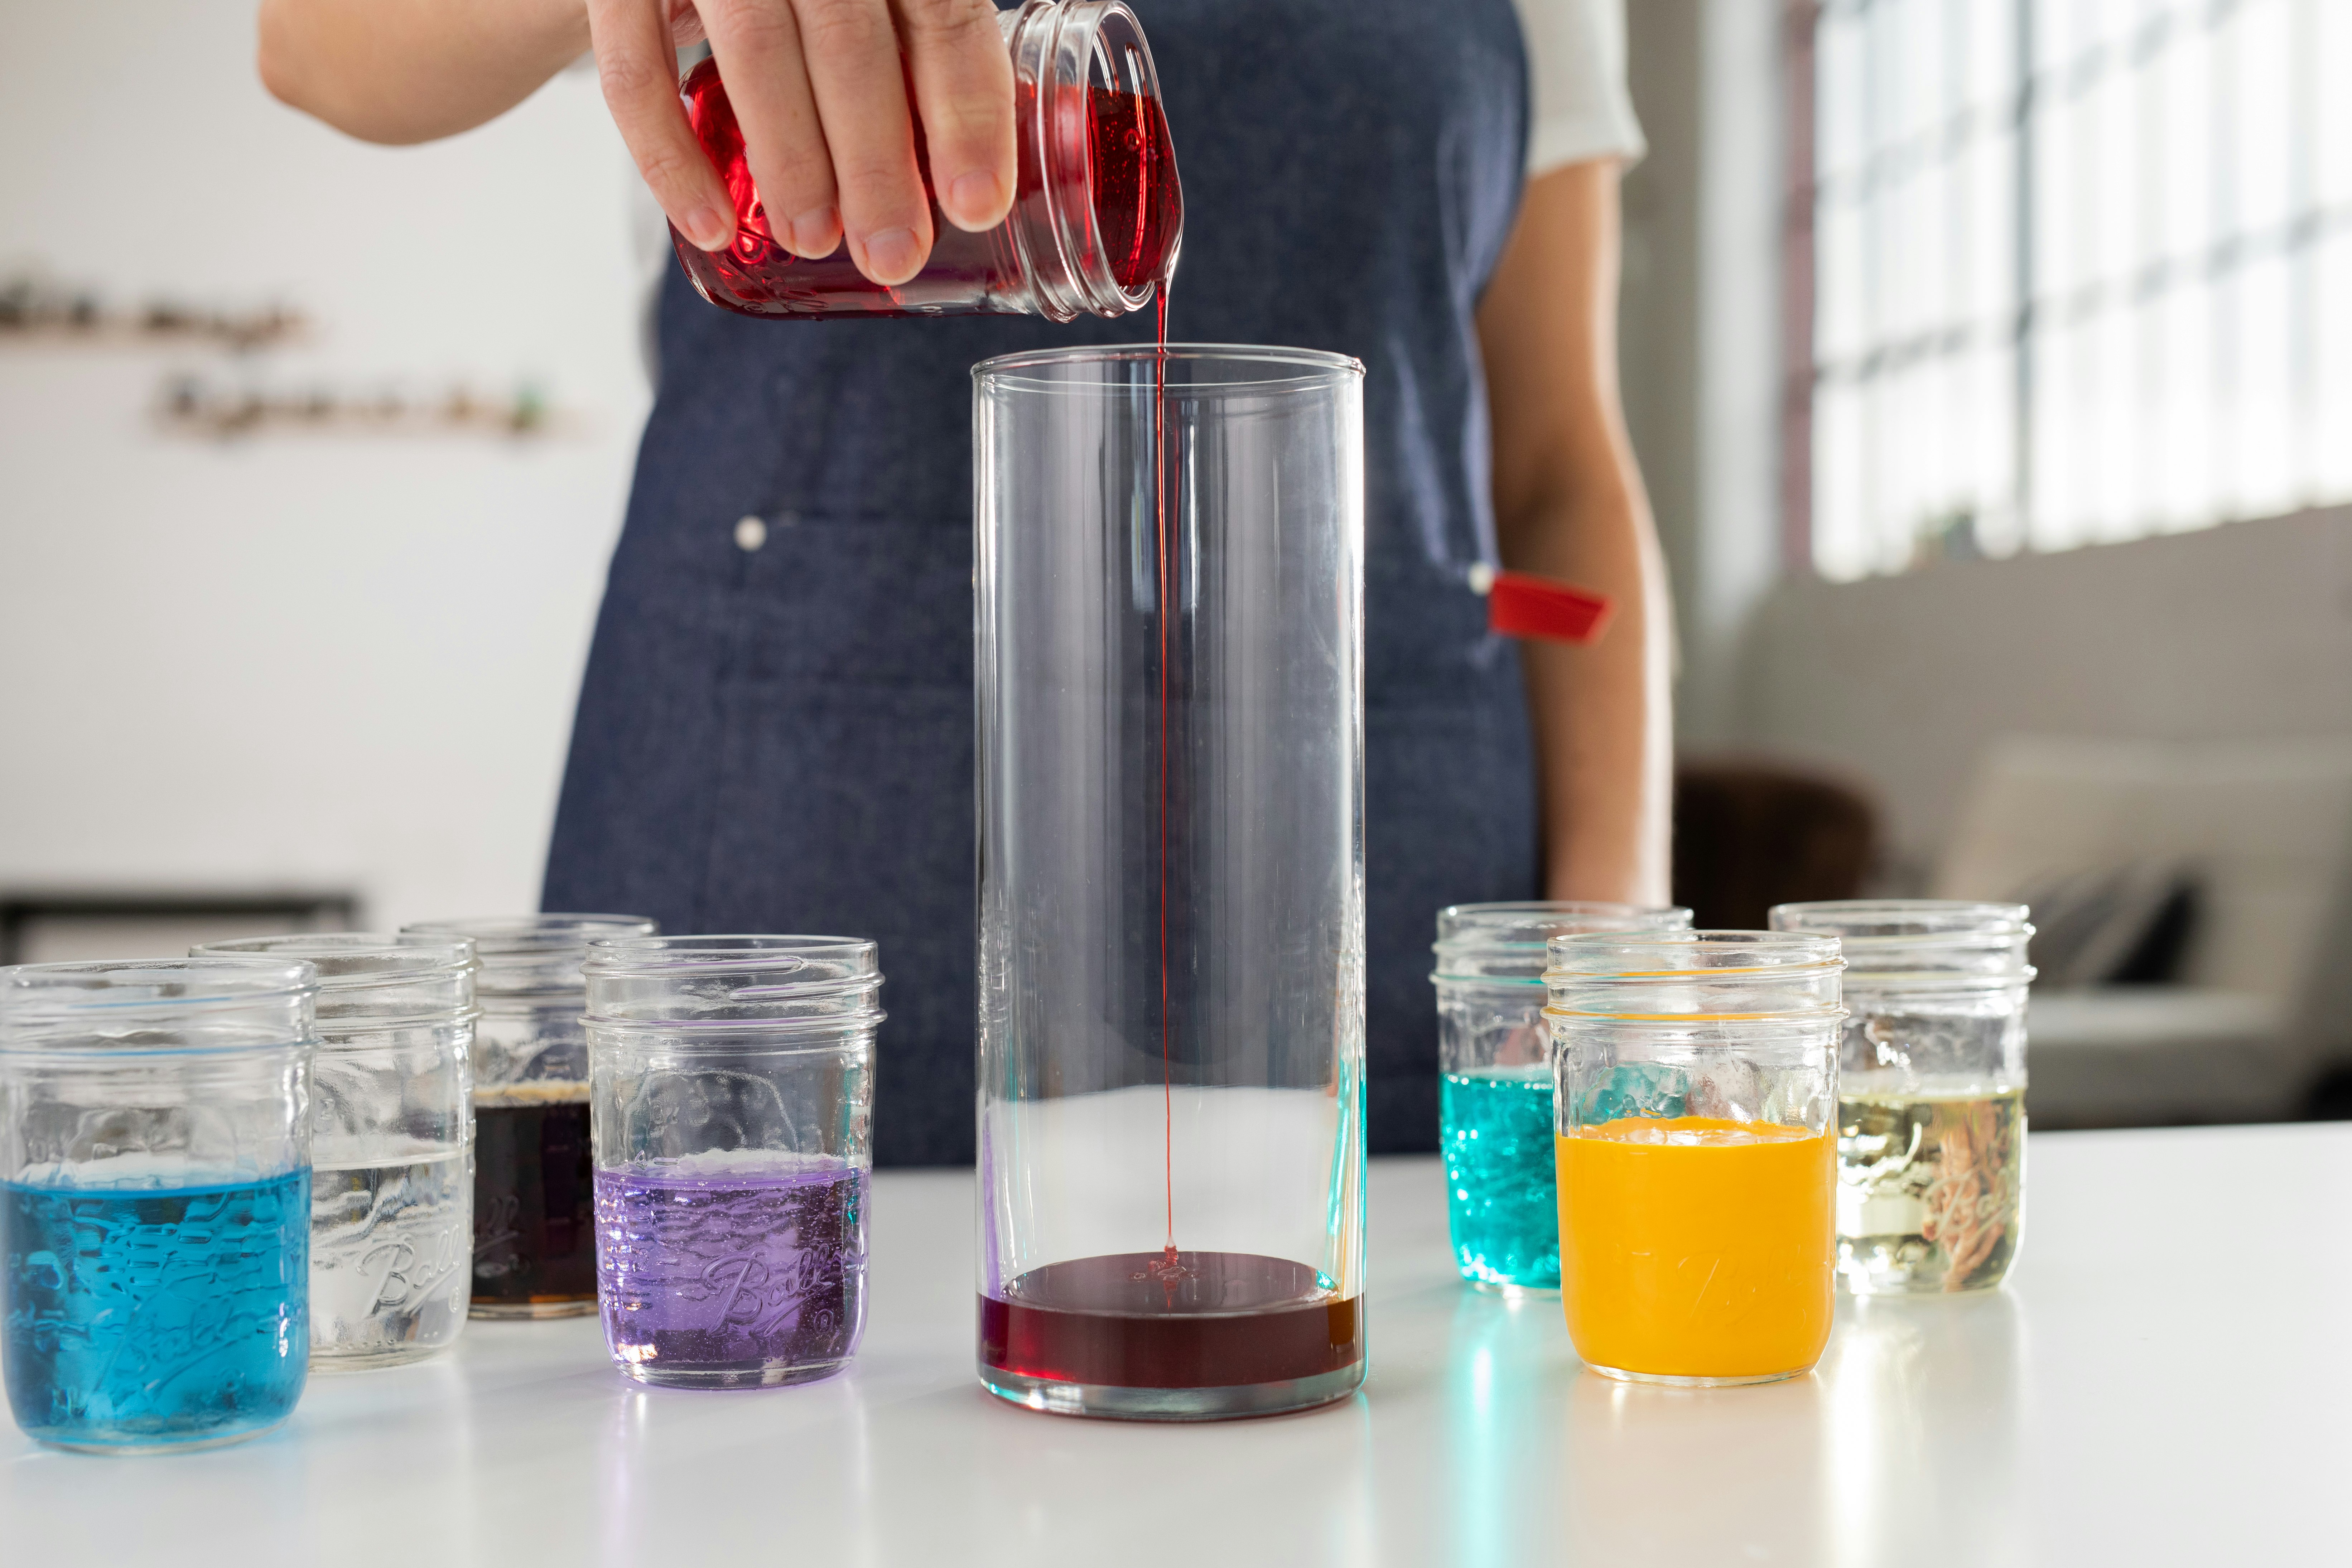
- Once the honey has settled, add the next densest liquid. (Tip: pour the liquid over a spoon to keep it from disrupting the liquid below it. This helps distribute the liquid so that it doesn’t splash.)
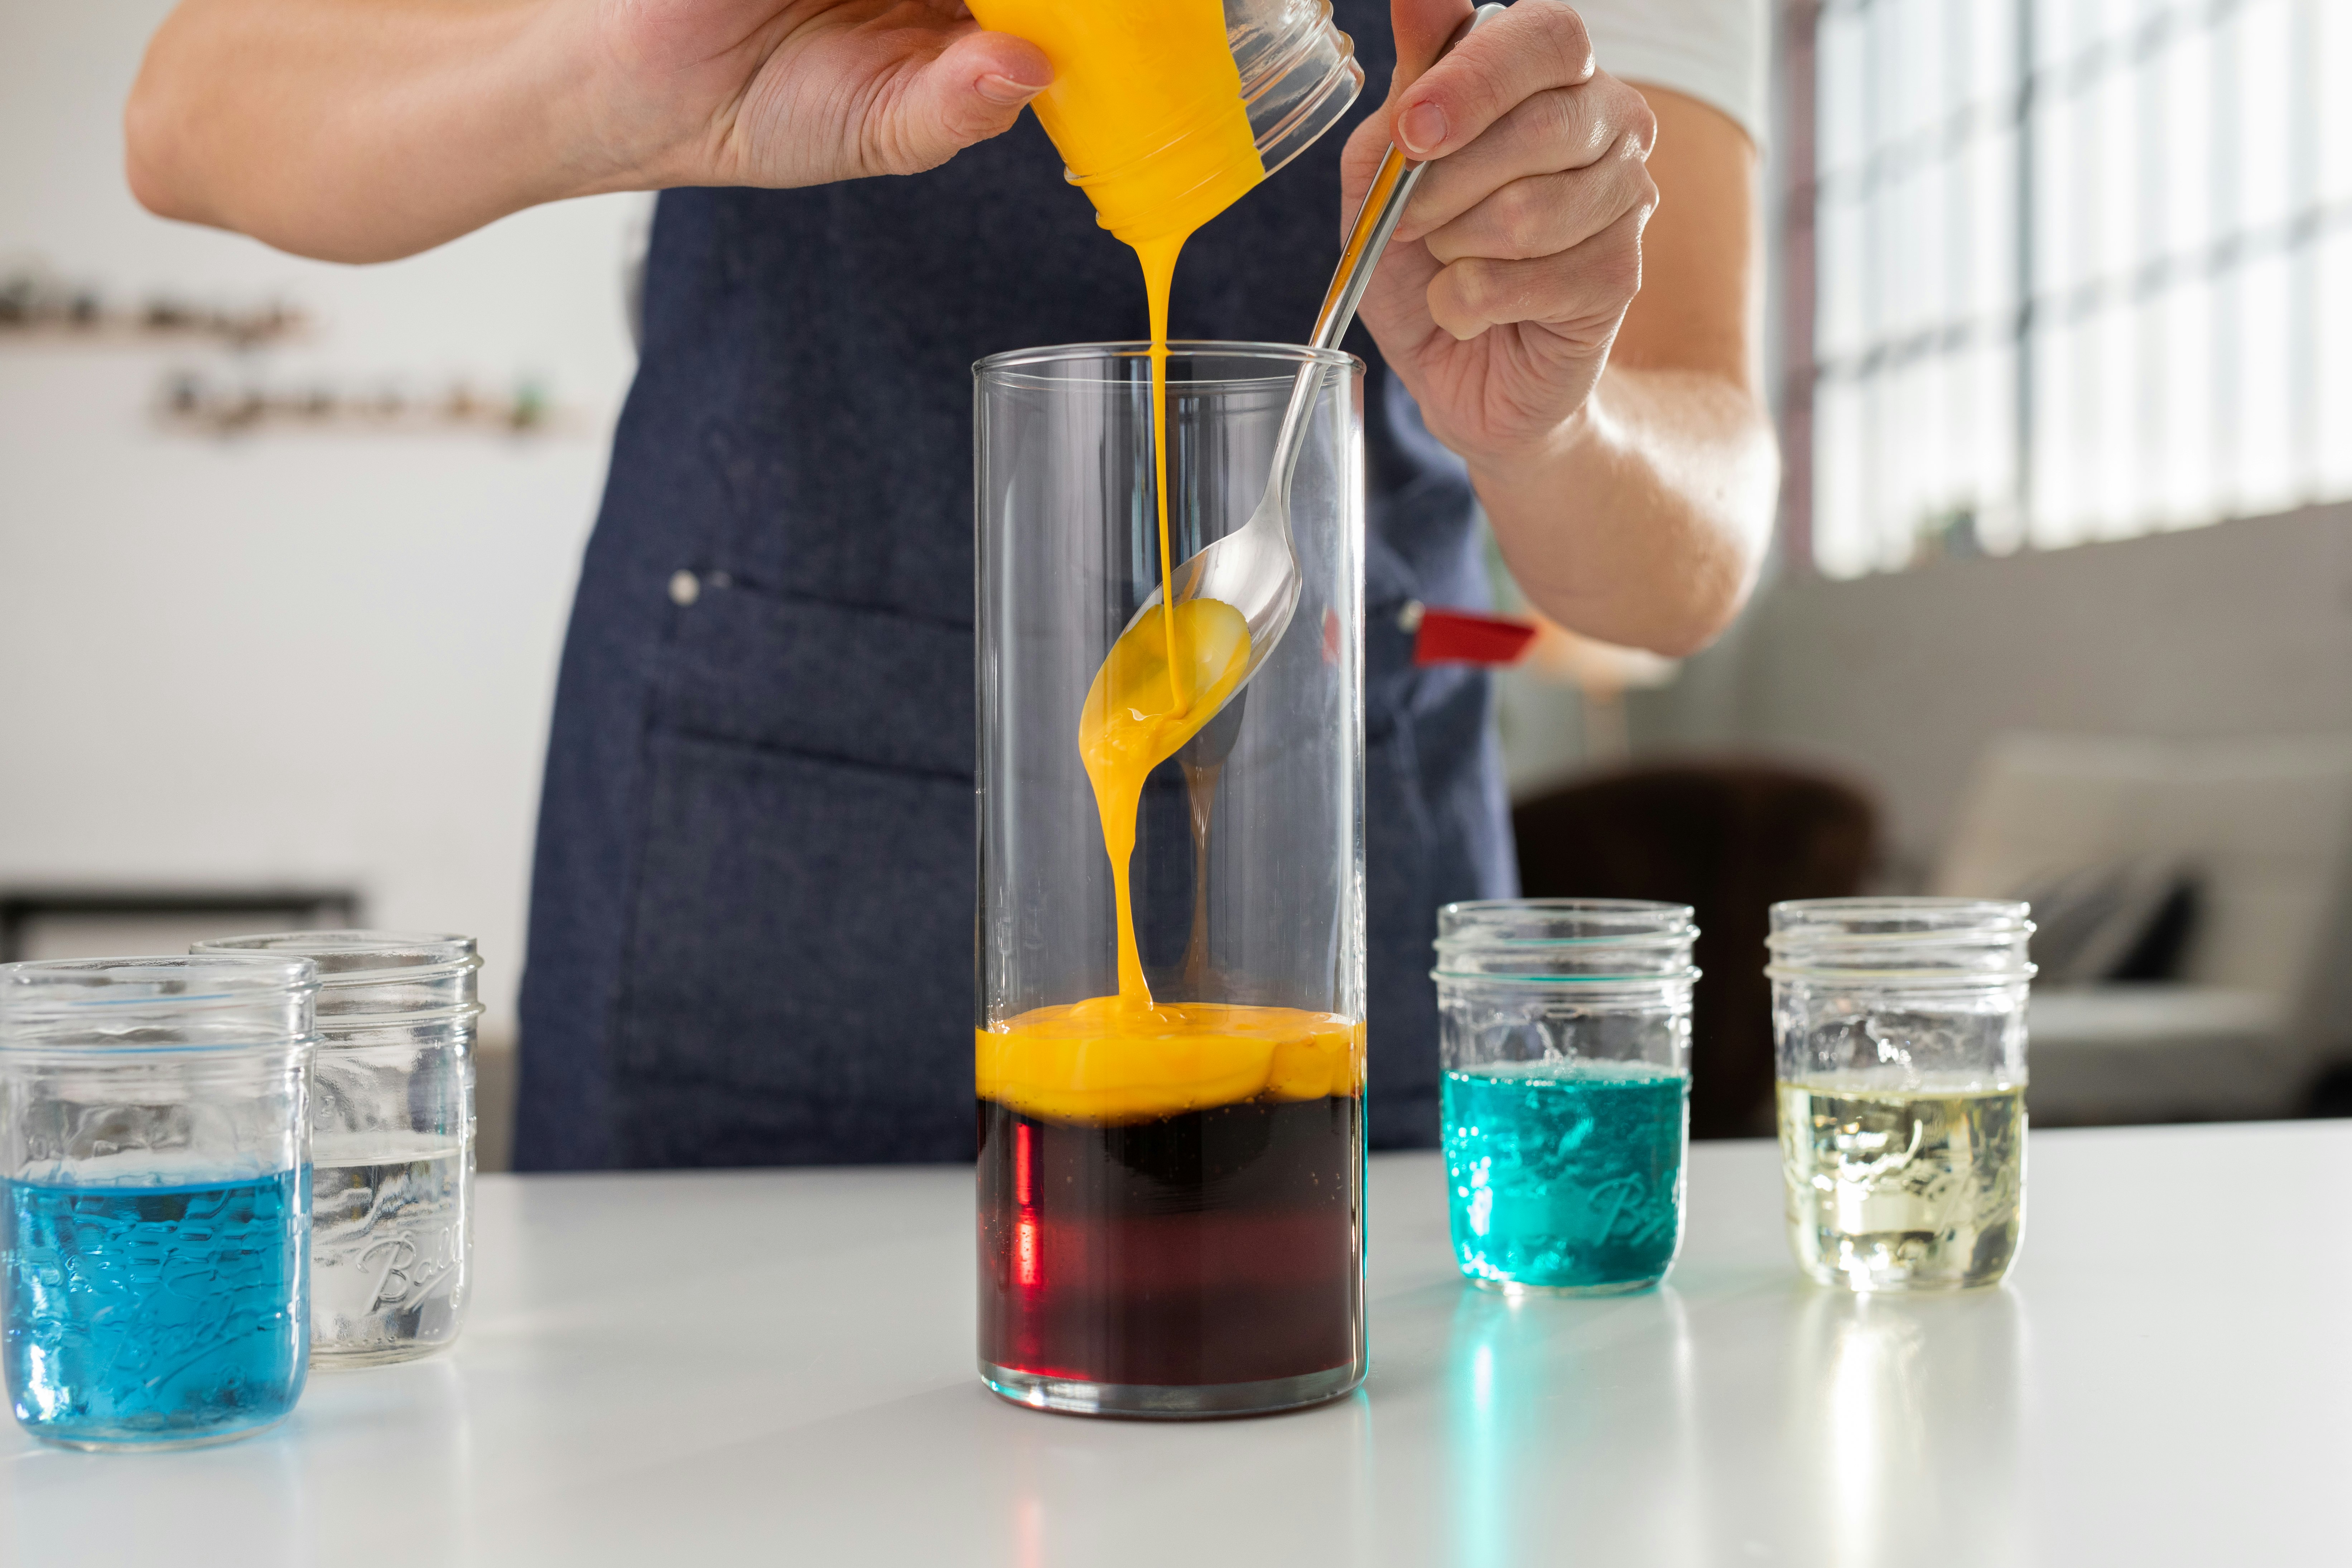
- Continue to pour the liquids into the vase in order of density, pausing to let the liquids settle before pouring the next.
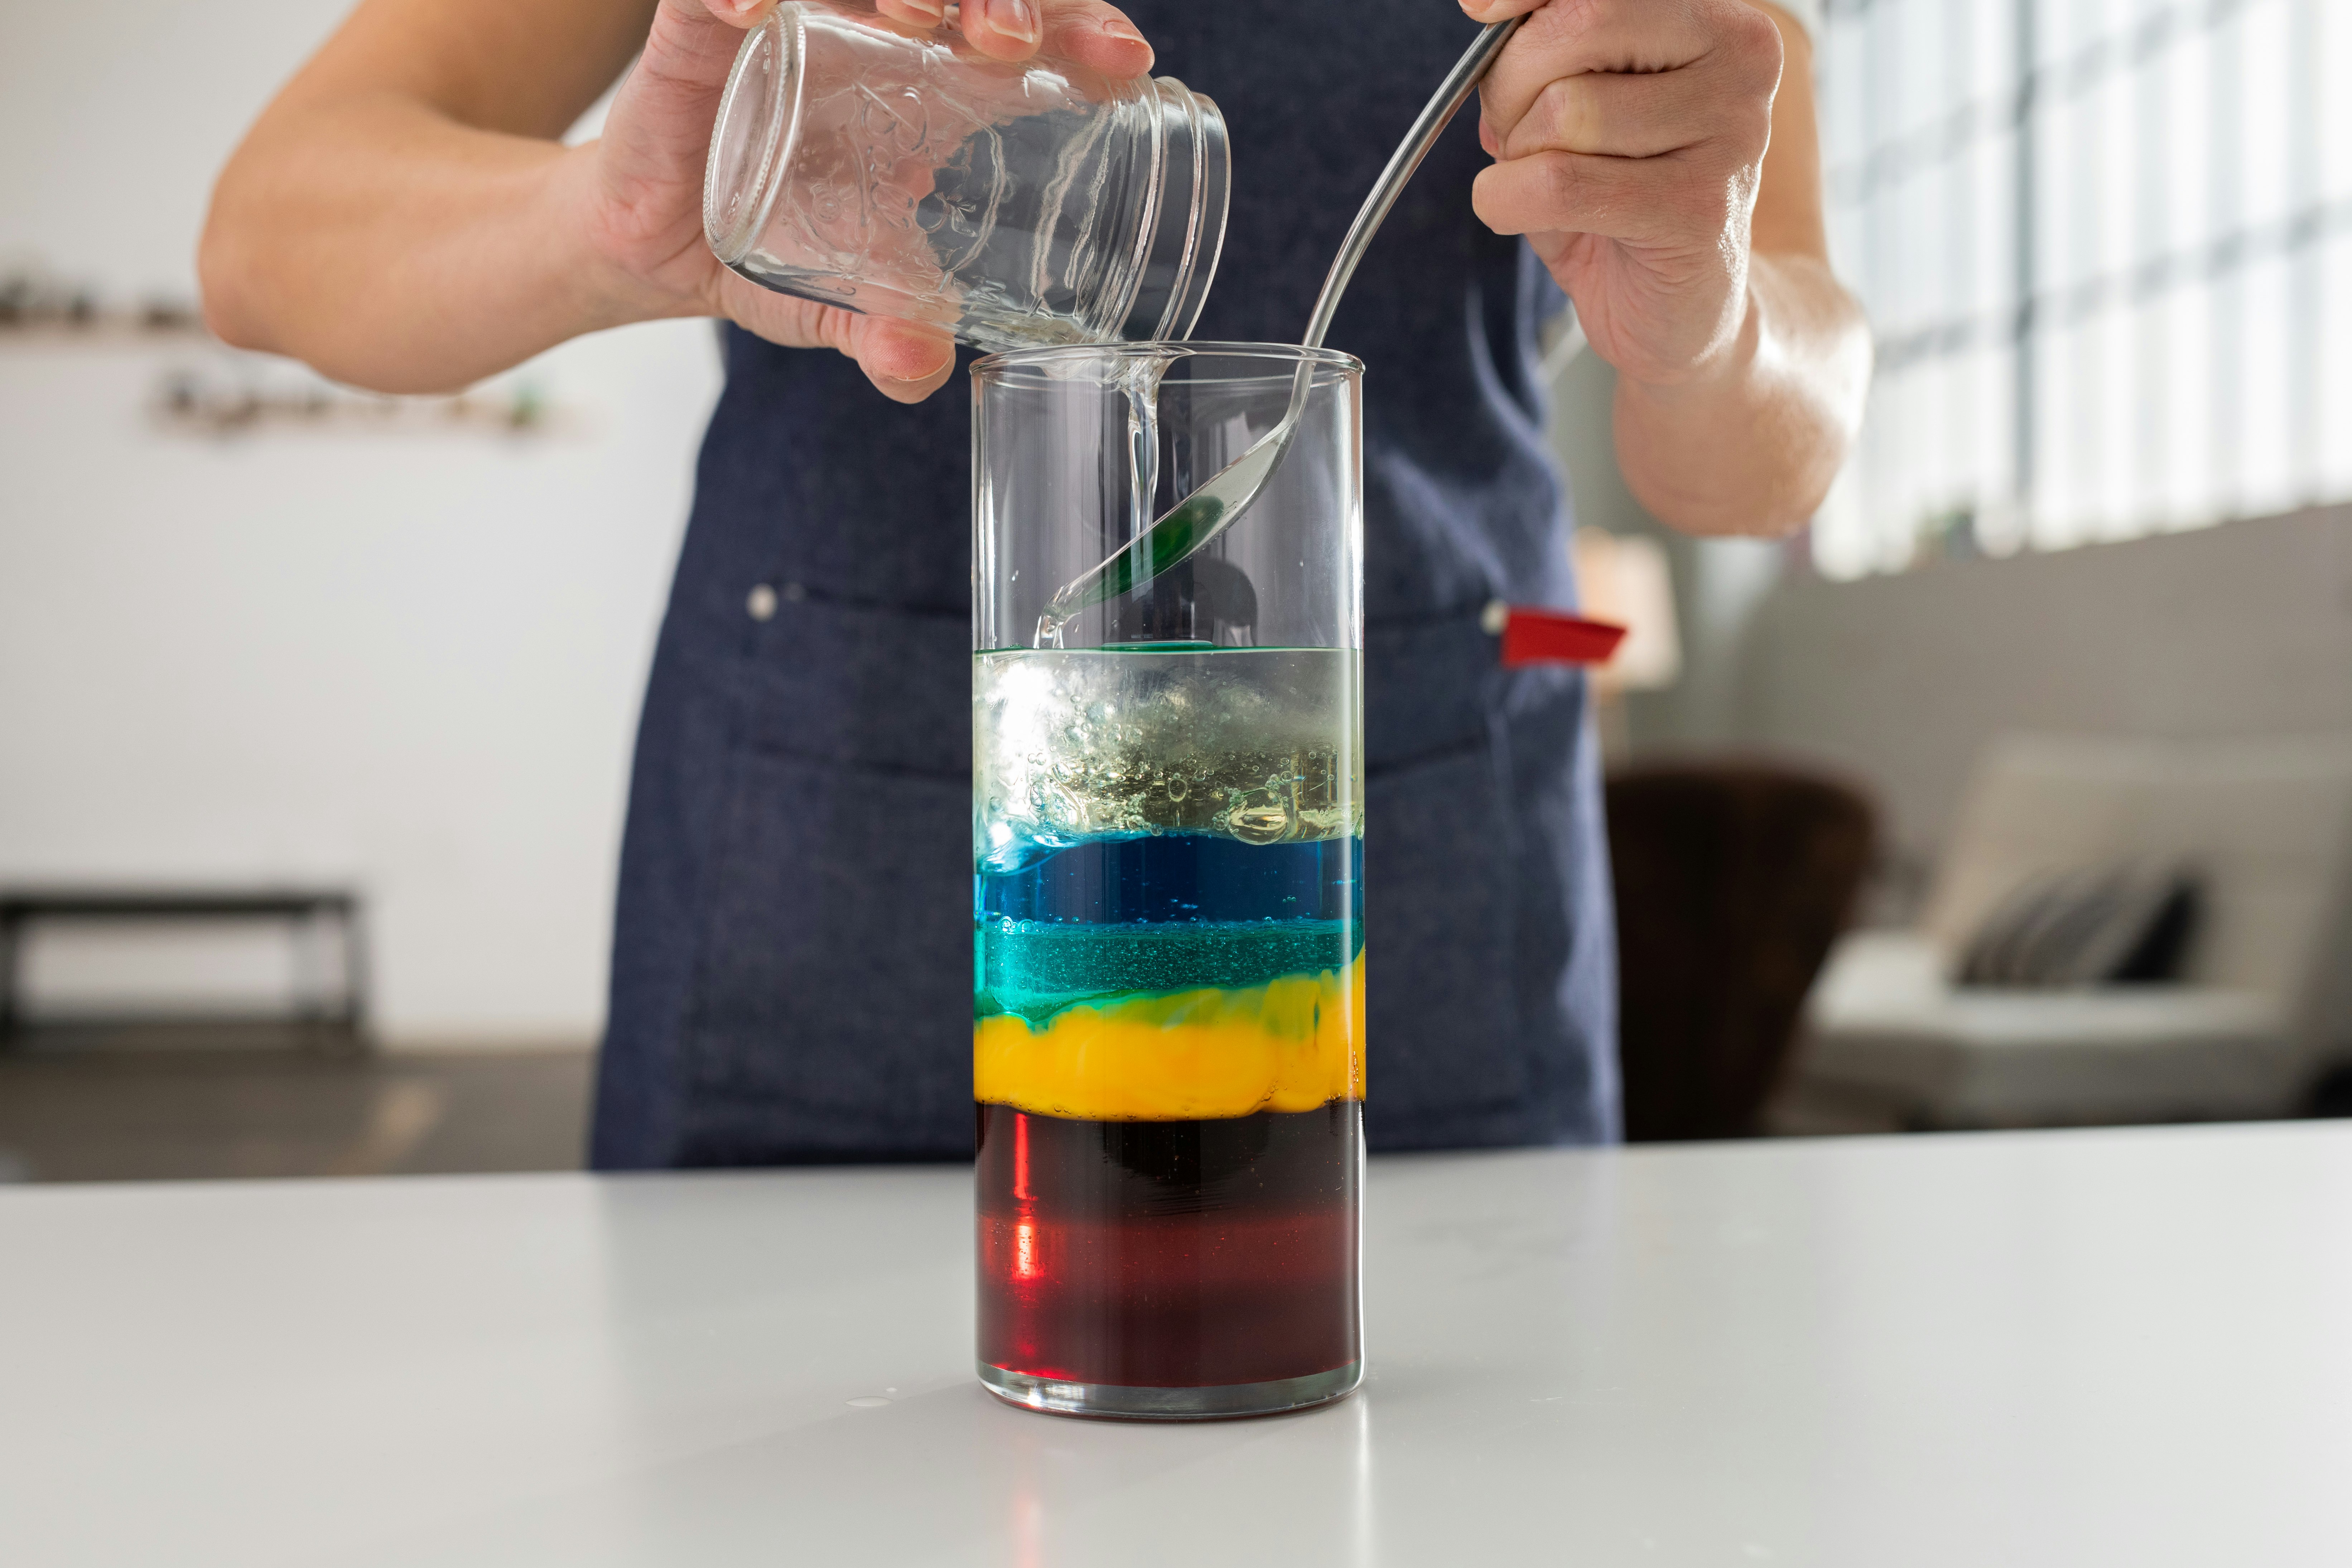
- Once you’ve added all the liquids, you may need to wait a few minutes for the liquids to settle into their respective layers. But once they do, stand back and admire your beautiful work!
Learn More – STEAM Extensions:
- What do you think would happen if you added another liquid to your density column? It depends on how dense the liquid is! You should try it. First, pour in something dense, like shampoo. You’ll notice that the shampoo will slowly settle into a new layer toward the bottom of the column because shampoo is very dense. Now add some milk. Milk has a very similar density to water, so when you add it to the column, it will likely sink through the oil and mix with the water to form a big milky layer.
- What exactly is density anyway? The density of an object tells you two things. The first thing it tells you is how much the object weighs. The second thing it tells you is how large the object is, or how much space it takes up. (For example, when you compare a marshmallow to a golf ball, they both take up about the same amount of space, but a golf ball has a higher density because it is heavier.) Liquids that are denser settle onto the bottom of the density column, while liquids that are less dense float on or near the top.
- How do you figure out the density of a liquid? It doesn’t take a maths genius to figure out density – you just need a formula, and here it is: D = Mass/Volume. Let’s try it! Grab a jar that has a marking every 100 ml. First, figure out the mass of the jar on its own. Place it on a cooking scale and jot down the mass. Then, add 100 ml of any liquid. (Need ideas? Try orange juice, real maple syrup, buttermilk, or shampoo.) Place the jar back on the scale and jot down the mass. Subtract the mass of the jar from the total mass to get the mass of the liquid. Then, divide that mass by 100 ml (the volume of your liquid) to get the density.
- Are you wondering what would happen if you stirred the density column? Try it! Don’t worry. You won’t ruin your column. With a big spoon, stir all the liquids until they resemble a big mucky mess. Then set your column aside. If you wait a few hours and come back to it, you’ll find that each liquid will have settled back into its original layer. How cool is that?

Level Up – Options for Older Kids:
-
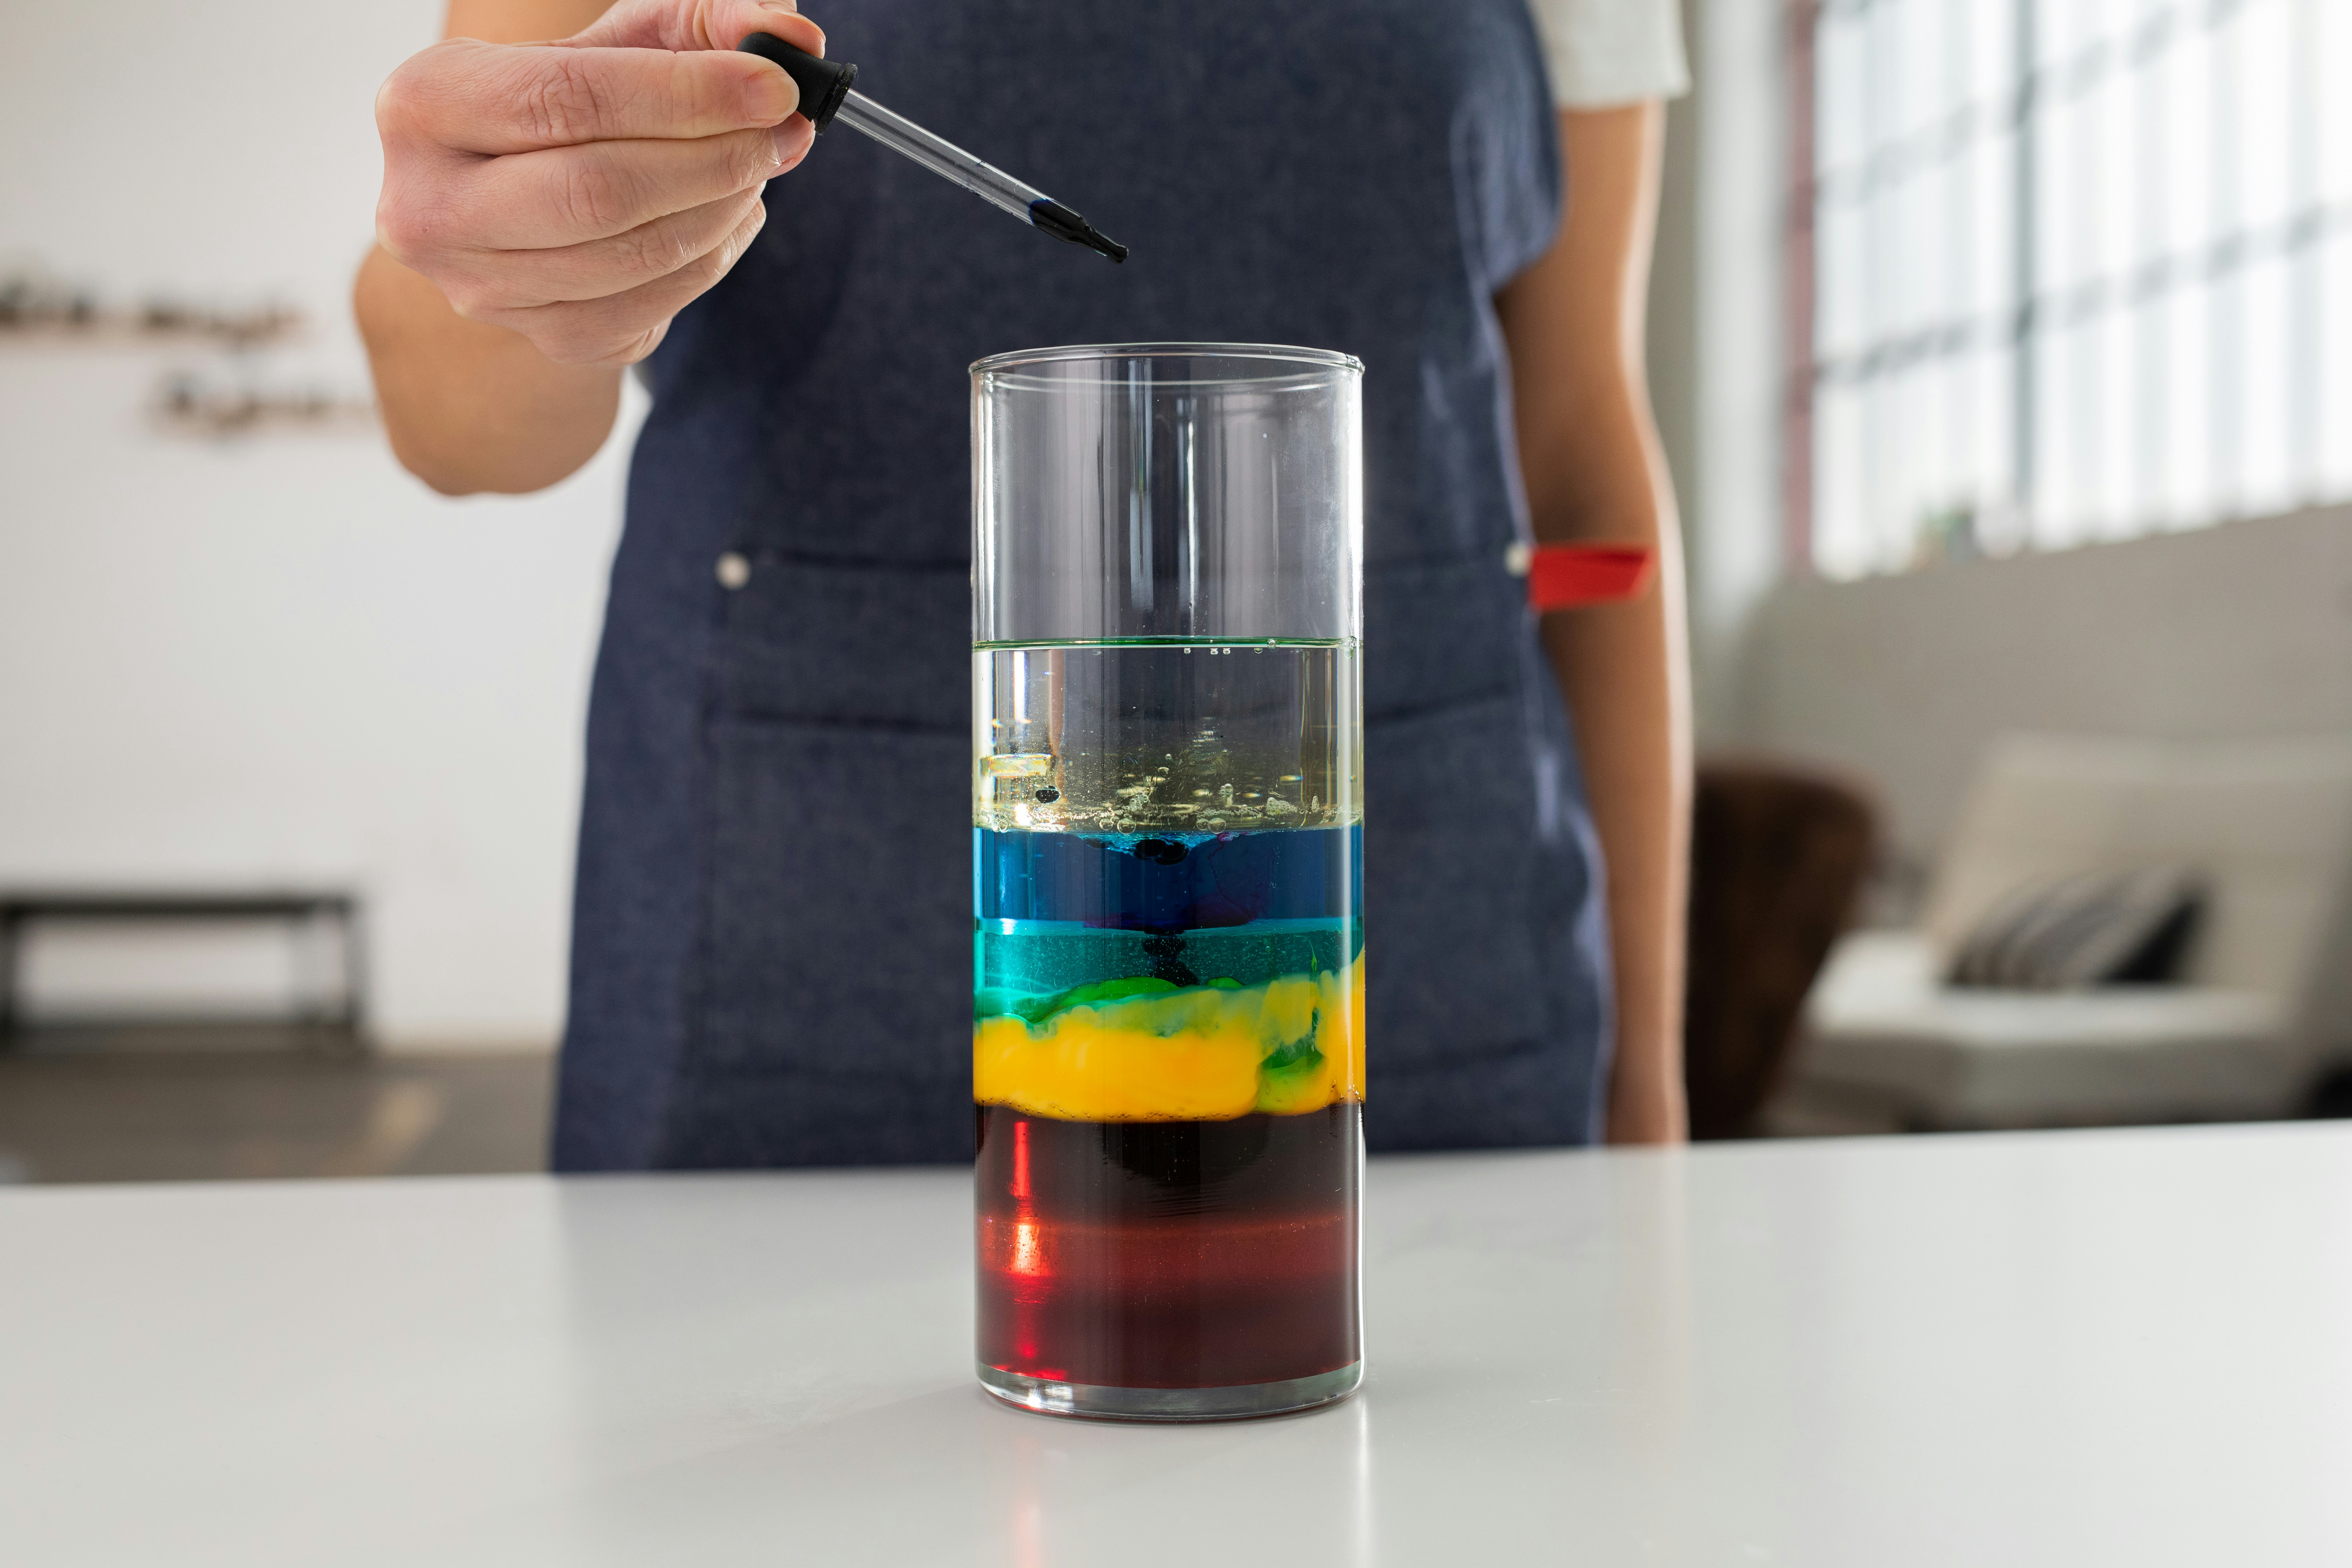
Add food colouring to your column. Remember how we told you that oil and food colouring won’t mix? That’s because the food colouring has a higher density than the oil. Try putting a few drops of food colouring onto the top of your column. What happens? You should notice the food colouring slowly moving through the oil in streaks and then settling into the water layer. Because the food colouring isn’t as dense as the syrups, it should stop and rest on top of that layer.
- Make your own density experiment. Now that you know what density is, see if you can make a solid guess (or a hypothesis) about the density of various liquids. Open your refrigerator or bathroom cabinet and look at the various liquids inside. See if you can make a hypothesis about which liquids have the highest density and which have the lowest. Do you think apple juice is more or less dense than salad dressing? Do you think hand soap is more or less dense than facial oil? When you’re done making guesses, make a mini density column in a jar to test your hypotheses.
Standards Alignment:
Next Generation Science Standards
- MS-PS1-2: Analyse and interpret data on the properties of substances before and after the substances interact to determine if a chemical reaction has occurred.